[Windows 10] How to manually create a restore point
How to Manually Create a Restore Point (Win 10)
Table of Contents
Description
Method of operation
Reference information
Description
Creating a restoration point saves all of the computer’s programs and settings at the time of its creation. Users create a restoration point before making a change that might alter the behavior of their computers, so they can use System Restore to undo the change if needed. Once created, you will see the name of the restore point that you have created on the restoration point list with the date and time it was created. You will be able to specify this restoration point when doing a System Restoration.
Method of operation
- Right-click the Start button.
- From the Quick Links menu, select System.

Reference information】
The Disk Management screen can also be displayed using the following keyboard shortcut:
- Press the Windows key and the “X” key at the same time.
- When the Quick Links menu screen is displayed, select System.
- The system menu will appear
No further work is required.
- From the System screen, select System Protection from the left side of the menu.
- Under the “System Protection” tab, select Create.

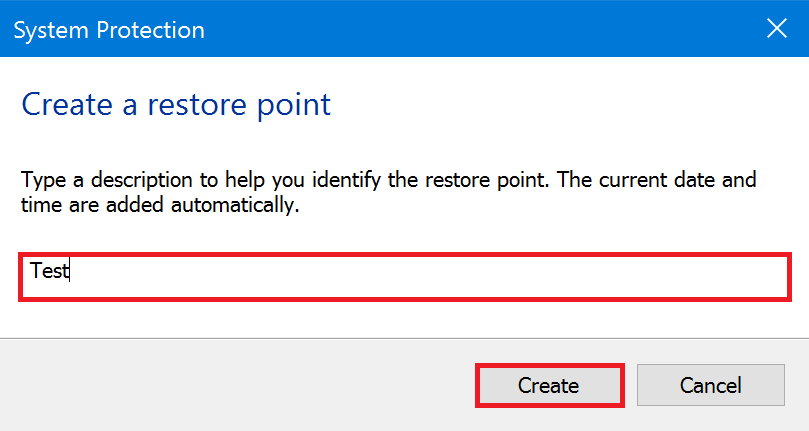
- When the System Protection screen is displayed, enter the name you have chosen for your restoration point and then select Create.
- When the message “Creating a restoration point…” appears, please be patient and wait.

- When the message “The restoration point was created successfully,” appears, select Close.

- When you return to the System Properties screen, select OK.
This completes the operation above.
【Reference information】
For instructions on how to run a System Restoration, please refer to the related Q & A below.
▼ Related Q & A:
How to Perform a System Restore (Win 10)